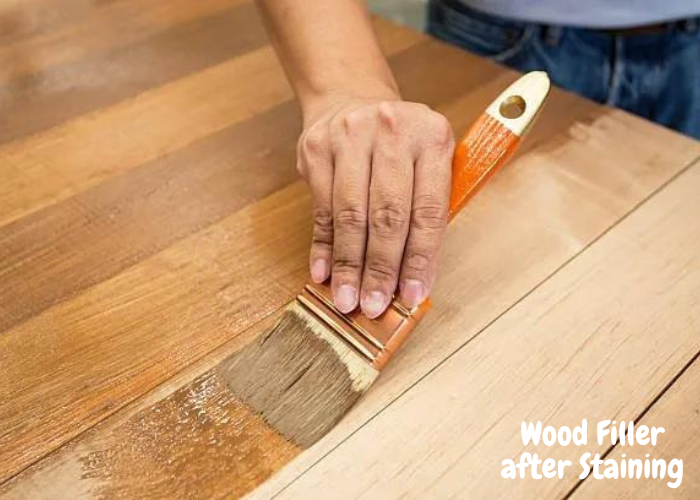
Wood filler is a versatile product that is commonly used to repair imperfections in wood surfaces. Whether you are working on a furniture restoration project or simply filling in nail holes, wood filler can help create a smooth and flawless finish. However, once you have applied the wood filler and stained the wood, it is crucial to hide the filler to achieve a seamless and professional look.
Why is it Important to Hide Wood Filler after Staining?
Hiding wood filler after staining is essential because it ensures that the repaired areas blend seamlessly with the rest of the wood. When you stain wood, the color penetrates into the grain, enhancing its natural beauty.
If the wood filler is not properly hidden, it can create visible patches or discoloration, detracting from the overall aesthetic appeal. By properly concealing the wood filler, you can achieve a cohesive and polished finish that will make your project look like it was never damaged in the first place.
Understanding the Different Types of Wood Fillers
Before diving into the process of hiding wood filler after staining, it is important to understand the different types of wood filler available. There are two main types: water-based and solvent-based.
Water-based wood fillers are easy to work with and clean up, making them a popular choice for many DIY enthusiasts. Solvent-based wood fillers, on the other hand, are more durable and resistant to shrinking or cracking. Both types can be used effectively, but it is essential to choose the one that best suits your specific project needs.
Preparing the Wood Surface for Staining
To ensure a successful outcome, it is crucial to properly prepare the wood surface before applying wood filler and stain. Start by thoroughly cleaning the wood to remove any dirt, dust, or debris that may interfere with the adhesion of the filler and stain. Use a mild detergent and warm water, along with a soft brush or cloth, to gently scrub the surface. Once clean, allow the wood to dry completely before proceeding.
Applying Wood Filler before Staining
Once the wood surface is clean and dry, it is time to apply the wood filler. Use a putty knife or a similar tool to spread the filler evenly over the damaged area, making sure to fill in any gaps or holes.
Smooth out the surface of the filler, ensuring it is flush with the surrounding wood. If necessary, apply multiple layers of filler, allowing each layer to dry completely before adding the next. This will ensure a strong and seamless repair.
Sanding the Wood Filler
After the wood filler has dried completely, it is important to sand the surface to create a smooth and even finish. Start with a coarse-grit sandpaper to remove any excess filler and level the surface.
Gradually move to finer-grit sandpaper, working your way up to achieve a polished and refined surface. Be sure to sand in the direction of the wood grain to avoid leaving visible scratches. Take your time during this step, as it will directly impact the final result.
Applying Stain to the Wood Surface
Once the wood filler has been sanded and the surface is smooth, it is time to apply the stain. Choose a stain color that matches the surrounding wood or achieves the desired look. Before applying, stir the stain thoroughly to ensure an even distribution of color.
Using a brush or a clean cloth, apply the stain in long, smooth strokes, following the direction of the wood grain. Allow the stain to penetrate the wood for the recommended amount of time specified by the manufacturer.
Techniques for Hiding Wood Filler after Staining
To effectively hide the wood filler after staining, there are a few techniques you can employ. One method is to apply multiple coats of stain, focusing on the repaired areas. This will help blend the color and make the wood filler less noticeable.
Another technique is to use a wood stain marker that matches the color of the stain. Apply the marker directly to the wood filler, gently blending it into the surrounding stained area. This can help create a seamless transition between the filler and the rest of the wood surface.
Tips for Achieving a Seamless Finish
To achieve a truly seamless finish when hiding wood filler after staining, consider the following tips:
- Choose the right wood filler: Ensure that the wood filler you use is compatible with the type of wood and the stain you are using. This will help achieve a better color match and overall finish.
- Practice on a scrap piece of wood: Before applying wood filler and stain to your project, it is a good idea to practice on a scrap piece of wood. This will allow you to test different techniques and ensure the desired result.
- Apply thin layers of wood filler: When applying wood filler, it is better to apply thin layers and build up gradually. This will make it easier to achieve a smooth finish and prevent excessive sanding.
- Blend the stain: When applying stain, always blend it into the surrounding wood to create a seamless transition. Take your time and work in small sections to achieve an even color.
- Use a topcoat: Applying a clear topcoat over the stained wood can further enhance the overall appearance and help hide any remaining traces of wood filler.
Conclusion
Hiding wood filler after staining is an important step in achieving a professional and flawless finish. By properly preparing the wood surface, applying the wood filler, sanding, and staining, you can effectively conceal any imperfections and create a seamless look. Remember to choose the right type of wood filler and stain, and utilize techniques such as multiple coats of stain or a wood stain marker to achieve the desired result. With careful attention to detail and proper execution, you can successfully hide wood filler after staining and transform your project into a work of art.
